 “Set up a listing on Bing?” you might be asking yourself. “But who actually uses Bing, anyway?”
You might be surprised. In 2023, Bing’s market share grew to 8.23%. Evidently, a large number of potential customers (we’re talking millions) are searching for local businesses on Bing. Just because it isn’t Google doesn’t mean it doesn’t exist! You’ll need more than a Google My Business profile to extend your reach.
Bing is the default search engine on the browser that’s installed on every Windows computer: Edge (formerly known as Internet Explorer). If a customer looks up “plumbers near me” and your business doesn’t show up, they won’t be calling you.
Have you ever noticed Google’s Local 3-Pack? Whenever you search for a local business, Google compiles a selection of the top 3 results. Bing has a similar feature, except that it lists the top 5 businesses in your area. To show up in this list, you’ll need a claimed and verified listing.
Here’s How to Set Up a Profile On Bing Places:
Log in to or create your Microsoft account
If you already have a Hotmail address or Skype account, then you have a Microsoft account. If not, simply create a new one here, and you’re ready for the next step.
Claim your listing
Visit the Bing Places website. After you click “Get Started” on the Bing Places homepage, type in the name and region of your business and see what appears. Does your business show up? Great! Select “Claim and edit details”. However, if nothing comes up, you’ll need to select “Create new business”. At this point, you’ll need to sign into the Microsoft account that you created earlier.
You can verify your business by phone, by SMS/text, or by post.


Once you have verified your business you can begin adding your information.
Add Information To Your Profile


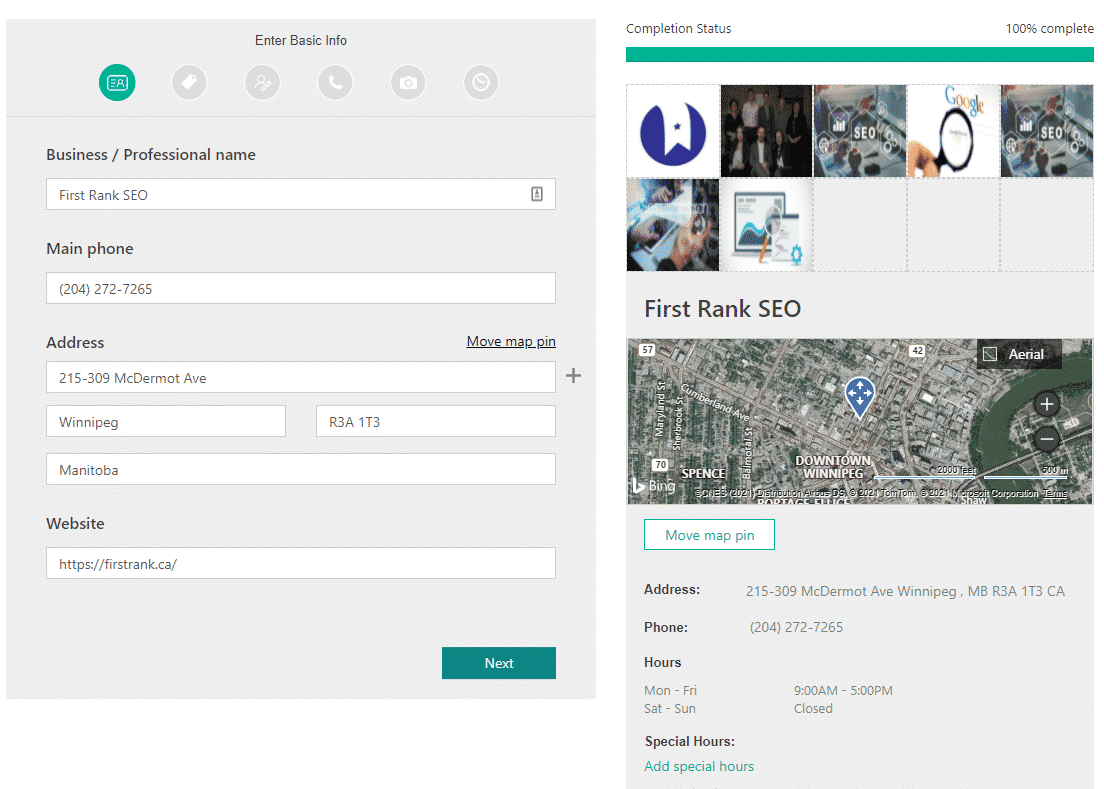
Fill out all the required information for your listing—the more details you provide, the better. Bing Places lets you supply more information than a listing on Apple Maps, so take the time to write as much as you need. If you had a preexisting listing, correct any inaccurate information.
Each time that you click “Next”, you’ll be prompted to add more details. Add your business category, a description, and choose whether you’d like to display your address or hide it. Don’t forget to add photographs of your business, like your storefront and company logo! They can make your listing look more enticing to customers.
Another Option: Import information from your Google My Business listing.
If you already have a GMB profile, then this process just got a lot easier. One of the great features in Bing Places is that you can simply transfer the information from your GMB directly into your new listing. It will instantly verify your listing and can even sync changes in real-time.
Verify Your Listing
How does Bing know that the person making changes to your listing is really you? After all, you want to be sure that not just anyone can alter your listing. You’ll need to go through an authorization process to verify your business.
There are a few ways to verify your listing on Bing. You can receive your PIN verification code over the phone or text message. The last option is via postcard, which can take up to 6 business days to arrive.
Once you have your code, navigate to the Bing Places Dashboard. You’ll see an option to verify your business; simply enter in the code, and you’re all done!
How you market your business plays a pivotal role in its success. You’ll start reaching more customers when your business is listed on Google, Bing, and Apple Maps.
Not everyone uses the same search engine to find local businesses. To reach a wider range of clients, make sure your business is optimized everywhere that potential clients are searching. If you have any questions or need help claiming your Bing listing contact the team at First Rank today. You can reach us by calling 204-272-7264 or by filling out our contact form.


