You’ve just launched your Shopify store, sales are trickling in, and now you’re staring at a dozen tracking codes from Google, Meta, TikTok, and Klaviyo wondering where they all go. That’s exactly why Google Tag Manager exists, and why learning the best way to install it on your Shopify store is one of the smartest moves you’ll make this year.
In This Guide
Why Google Tag Manager Matters For Your Shopify Store
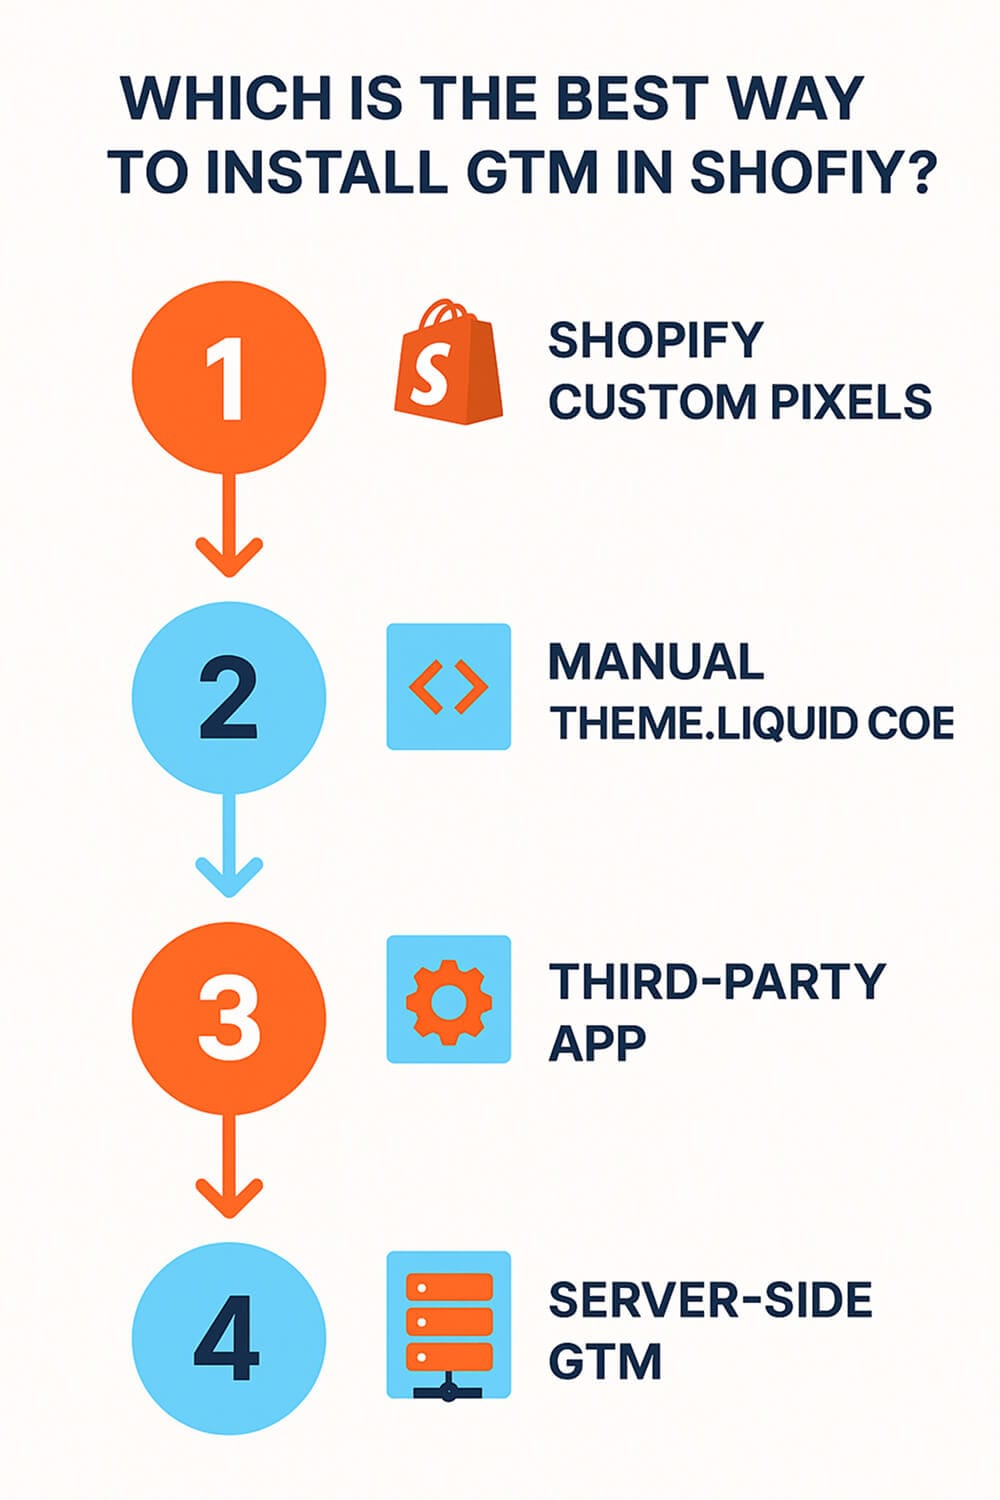
Three Methods To Install GTM In Shopify
How To Install GTM Using Shopify Custom Pixels (Recommended Method)
How To Add GTM Directly To Your Shopify Theme Code
Using A Third-Party App To Install GTM On Shopify
How To Test And Verify Your GTM Installation
Get Expert Help Installing Google Tag Manager On Your Shopify Store
Frequently Asked Questions About GTM And Shopify
We’ve helped hundreds of ecommerce store owners get their tracking dialled in, and we can tell you this: the stores that grow fastest are the ones that know their numbers. This guide walks you through every method for installing Google Tag Manager (GTM) in Shopify, helps you pick the right one for your situation, and shows you how to avoid the mistakes that trip up most merchants.
Why Google Tag Manager Matters For Your Shopify Store
Google Tag Manager is a free tag management system that lets you manage and deploy marketing tags without touching your website code every time you need a change. Instead of manually editing your Shopify theme code every time you want to add or update a tracking snippet, GTM centralizes that entire process into one clean interface.
Without GTM, adding a new tracking pixel means diving into your theme files, pasting code in the right spot, and hoping you don’t break anything. Multiply that by five or six platforms, and you’ve got a mess. GTM executes tags based on triggers and variables you configure, so you define exactly when and where each tag fires, then publish. No theme editing required.
GTM supports integration with a wide range of third-party tools and analytics platforms. It supports versioning so you can track changes and test tags before they go live. GTM also looks for specified patterns in the URL or page data and returns the corresponding page category, which powers content grouping in your reports. Its intuitive user interface means marketers can manage tags independently without waiting on a developer for every small change.
On Shopify specifically, GTM helps you organize marketing pixels without needing deep technical website knowledge. Data from Shopify’s Customer Events can be pushed to the browser’s data layer using `dataLayer.push()` calls, and from there, that data feeds into Google Analytics 4 (GA4), Meta Conversions Application Programming Interface (API) (CAPI), or any ad platform you’re running. It’s how you connect what happens in your store to the platforms that drive your advertising and improve your Return on Ad Spend (ROAS).
The same principle applies on other e-commerce platforms: integrating GA4 with GTM on Salla, a popular e-commerce platform in the Middle East, enables comprehensive insights into customer behavior using the same tag management workflow.
Ad-blocking extensions can prevent GTM from loading for some visitors, which is why server-side tracking has become more popular. And maintaining your GTM tags is essential for keeping performance optimal and tracking accurate.
You’ll find apps like GroPulse GTM Data Layer that enable data layer functionality for Shopify stores, and platforms like Elevar that offer a unified dashboard for managing integrations across Shopify and GA4. The key takeaway: if you’re running ads, tracking conversions, or making data-driven decisions, GTM on Shopify isn’t optional. It’s fundamental.
Three Methods To Install GTM In Shopify
Let’s look at your main options for GTM installation in Shopify. GTM supports both app-based and manual implementation methods, and each has real trade-offs.
| Method | Best For | Skill Level | Cost | Tracks Checkout? |
|---|---|---|---|---|
| Shopify Custom Pixels | Accuracy across all pages | Intermediate | Free | Yes |
| Manual theme.liquid code | Full Document Object Model (DOM) access on storefront | Intermediate-Advanced | Free | No (without hybrid setup) |
| Third-party app (Elevar, etc.) | Ease of implementation | Beginner | $150-$500+/mo | Yes |
| Server-side GTM | Maximum data accuracy | Advanced | $20-100+/mo hosting | Yes |
Quick decision guide:
- Shopify Basic or Standard, comfortable with code, budget-conscious: Hybrid setup (theme.liquid + Custom Pixel). Free, accurate, and you control everything.
- Any plan, not comfortable with code: Third-party app like Elevar or Analyzify. Worth the monthly cost for the time saved.
- Spending $5K+/month on ads and losing conversions to ad blockers: Add server-side GTM on top of your existing setup. The recovered conversion data typically pays for itself within the first month.
- Shopify Plus with a developer on staff: Hybrid setup with server-side GTM for maximum control and accuracy.
The best approach for most stores in 2026 is a hybrid: GTM in your theme.liquid for storefront tracking combined with GTM via Shopify Customer Events (Custom Pixels) for checkout and purchase tracking.
This hybrid GTM installation approach ensures accurate and sandbox-compliant data collection across your entire site. Salla pushes important e-commerce data into the dataLayer just as Shopify does, which is why GTM skills transfer across stores.
Shopify encourages merchants to use custom pixels through the Shopify Web Pixels API to capture user interactions. The setup requires three separate scripts that handle different parts of the tracking pipeline. The custom pixel remains unaffected by theme changes – a huge advantage since changing themes in Shopify removes any custom code you’ve added to your theme.liquid file.
Custom pixels can be categorized as marketing, analytics, or preferences, and they require the Checkout Extensibility upgrade. GTM Preview Mode doesn’t work within the custom pixel’s sandboxed environment, which affects how you’ll test.
Dedicated GTM apps like Elevar and LittleData automate the data layer and handle the technical complexity for you. For technically capable store owners who want maximum control without a monthly fee, the manual approach still works well.
One important note: setting up GTM from multiple sources causes data layer issues. Whatever method you choose, stick with one source for your GTM configuration to avoid duplicate tracking.
How To Install GTM Using Shopify Custom Pixels (Recommended Method)
For most Shopify stores in 2026, the Custom Pixel method is the best option for accuracy. It uses Shopify’s Customer Events system, which gives you access to standardized data points representing user actions across all pages, including checkout. Customer Events are available to both Shopify Plus and non-Plus merchants.
The setup uses three required GTM scripts: a gtm-customer-events-storefront script, a theme script, and a custom pixel script. The storefront script acts as a bridge between the main page and the custom pixel sandbox iframe, listening to click events and sending event data to the custom pixel. The theme script adds the storefront snippet to your theme. The custom pixel script installs GTM within the sandboxed environment, listening to customer events and mapping them to data layer pushes.
Custom pixels can be managed in your store Settings under Customer Events. Events in the custom pixel script are tracked by default once set up, and the custom pixel code pushes a page_view event to the data layer automatically.
Step-By-Step Custom Pixel Setup
- Grab the three required scripts from the GitHub repository linked in most current GTM-Shopify guides.
- Add the theme script to your theme.liquid file.
- Navigate to Settings > Customer Events in your Shopify admin. Click “Add custom pixel” and name it “GTM Tracking.”
- Paste the custom pixel script into the code editor. You’ll need your GTM container ID (starts with “GTM-” followed by your unique code).
- Set the pixel’s permission category. Choose “analytics” for basic tracking, or “marketing” if you’re firing ad platform tags.
- Click Save, then Connect the pixel to activate it.
- In your GTM workspace, publish your container. GTM container changes in Shopify require publishing to take effect.
For click tracking, a Custom Event trigger uses the event name “custom_click_link_storefront.”
Limitations Of The Custom Pixel Method
Custom pixels run in a separate child iFrame, and this sandbox iframe creates real constraints.
Here’s what the sandbox blocks: your custom pixel can’t access `document.cookie` on the parent page, so tags that rely on reading or writing first-party cookies directly (like the Facebook Pixel in its default browser-side mode) won’t work as expected. There’s no `localStorage` persistence across pages. The `window.location` URL inside the sandbox is polluted with internal Shopify identifiers. And there’s no direct DOM manipulation, meaning standard GTM triggers for element visibility, scroll depth, and form interaction won’t fire.
For specific platforms: Meta’s Pixel needs to run through Meta CAPI (server-side) rather than browser-side. TikTok’s pixel faces similar cookie-reading limitations. GA4 within custom pixels can’t access the parent page’s URL, so you’ll need an Event Settings variable to pass clean URL data.
You’ll need to identify the correct custom pixel sandbox by looking for the one containing “CUSTOM-” followed by digits. The sandbox also prevents GTM Preview Mode from functioning entirely for checkout events.
Custom click events on storefront pages still allow tracking of element and link clicks with richer data. The workaround for most limitations is the hybrid approach: pair your custom pixel with a theme.liquid installation.
This hybrid setup also solves the cross-domain tracking problem between your storefront and checkout. Because Shopify’s checkout runs on a different subdomain, sessions can break when a visitor moves from browsing to purchasing. The custom pixel receives event data directly from Shopify’s Customer Events system rather than relying on cookies that don’t carry across subdomains, so checkout events stay connected to the browsing session.
How To Add GTM Directly To Your Shopify Theme Code
The manual theme.liquid method gives you full DOM access on your storefront pages, making it the right choice when you need standard GTM triggers, scroll tracking, or element visibility triggers that the custom pixel sandbox blocks.
The essential thing to understand in 2026: checkout.liquid is fully deprecated in favour of checkout extensibility. Any tutorial telling you to paste GTM code into checkout.liquid is outdated. The same goes for Universal Analytics (UA)-era enhanced ecommerce code – you need GA4-native event names like `view_item`, `add_to_cart`, `begin_checkout`, and `purchase`.
To add GTM to your theme code:
- In your Shopify admin, go to Online Store > Themes > Actions > Edit Code.
- Open your theme.liquid file.
- Paste the GTM container snippet head code just before the closing `</head>` tag.
- Paste the GTM body snippet immediately after the opening `<body>` tag.
- Save the file.
The GitHub container template can be imported into GTM via Admin > Container > Import Container, giving you pre-built tags, triggers, and variables. For your GA4 setup, create a Google Tag that includes your GA4 measurement ID in the Tag ID field. The send_page_view parameter controls whether page view tracking fires separately from the Google Tag. An Event Settings variable enables reuse of page parameters across all events and replaces polluted page location with clean URL data. The search_submitted Customer Event is sent to the data layer as a view_search_results event, which GA4 recognizes natively for search reporting.
Preventing Duplicate Tracking In A Hybrid Setup
The big limitation of theme.liquid alone is that it doesn’t track checkout page events. Conversion tracking needs the custom pixel method or a third-party app.
To prevent duplicate events, you need explicit trigger exclusions. In your theme.liquid GTM container, create a trigger that fires on “All Pages”, but add an exception for any URL containing `/checkouts/`. In your custom pixel GTM container, only fire tags on checkout and thank-you page events. A concrete example: your GA4 page_view tag in the theme.liquid container uses a “Storefront Pages Only” trigger with a URL exclusion filter for `/checkouts/`, while your custom pixel container’s page_view tag fires only on the Shopify `page_viewed` Customer Event.
Watch out for old tracking scripts in checkout settings, as they cause duplicate GA4 data. Merchants must subscribe to specific events provided by Shopify to receive that data in their custom pixel.
At First Rank, we always recommend documenting which GTM method handles which pages. This prevents the most common mistake we see: duplicate pageview and event tracking from running both containers without proper trigger exclusions.
Using A Third-Party App To Install GTM On Shopify
If code isn’t your thing, dedicated GTM apps like Elevar, LittleData, and Analyzify automate the data layer and implementation for you. A dedicated app is the easiest way to add GTM to Shopify.
Elevar is the most popular option. It improves marketing performance and data accuracy by handling complex data layer work automatically. Their Pro plan supports up to 10,000 orders per month, while their Business plan supports global markets and multi-storefront operations. Elevar is built for a cookieless future and delivers reliable data to Meta CAPI, Snapchat, Klaviyo, and other platforms without depending entirely on browser tracking. Their server-side tracking stitches events, sessions, and channel attribution together for a more complete picture.
Elevar’s pricing starts at roughly $225 per month. Their customer support resolves issues quickly with minimal required input, and they provide video documentation of fixes. At First Rank, we’ve seen their team demonstrate real professionalism when helping clients troubleshoot complex tracking setups.
GroPulse GTM & Data Layer is a more affordable alternative with pre-designed templates for beginners. Analyzify offers a solid balance of automation and customization for mid-size stores. GTM can also read dataLayer events from platforms like Salla, so if you manage stores across Shopify and other e-commerce systems, your GTM expertise carries over directly.
Trade-offs exist with any app approach. You’re adding a dependency on a third-party developer to maintain compatibility with Shopify’s evolving platform. Cross-domain tracking between your storefront and external domains isn’t supported through the sandbox, so server-side tagging is needed for cross-site measurement.
Be cautious with Shopify’s native Google & YouTube app. It causes over-attribution in conversion values and doesn’t pass all transactions to GA4 reliably. Disabling conversion tracking in the native app prevents sending duplicate data.
Price and value parameters need adjustment using discount amounts per GA4 requirements. The discount parameter should include the total discount amount covering both per-item and per-order discounts, and multiple coupons get combined into a single string separated by commas. Apps like Elevar handle these details automatically.
One quirk: the form submission event can trigger twice when Completely Automated Public Turing test to tell Computers and Humans Apart (CAPTCHA) appears during form submission, and it also fires upon unsuccessful form submission with errors.
The OneTrust app works within Checkout Extensibility pixels for consent management. Custom pixel categories enable integration with Shopify’s native consent banner, giving you a path to handle Google Consent Mode v2 requirements. Consent-aware tags inside the sandbox can’t read cookies directly, so your Consent Management Platform (CMP) needs to pass consent signals through the Shopify Customer Events API. CMPs like Pandectes and Consentmo have built integrations specifically for this workflow.
How To Test And Verify Your GTM Installation
Testing is where most store owners cut corners, and it’s exactly where problems hide. Centralized conversion tracking through GTM reduces the complexity of audits and maintenance compared to scattered platform-specific scripts, but only if your setup is verified end to end.
For storefront pages tracked through theme.liquid, Preview Mode works perfectly. Open Tag Assistant, connect to your store, and browse through your homepage, product pages, and cart. You should see your tags firing on each page load, with a GA4 Configuration tag with an All Pages trigger firing on every page.
For checkout events tracked through the custom pixel, you’ll need alternative methods. GA4 DebugView is your best friend here – access it via GA4’s Admin > Property settings > Data display > DebugView. The Google Analytics Debugger Chrome extension also verifies network request collection and enables Live Preview of events hitting your GA4 property.
Testing checklist:
- Page views tracked on all pages (verify in DebugView)
- The separate Google Tag for Google Ads fires on all pages
- Purchase events fire on the thank-you page with correct revenue data
- Add-to-cart events fire from product pages
- The page view network request contains the “dl” parameter with a clean page URL
For testing purchases, Stripe test mode is more robust than the discount code approach. Stripe test mode enables testing purchases on Shopify without processing real payments. The 100% discount code approach works too, but product discount code values can sometimes change to incorrect amounts due to floating-point errors.
Common issues: the search event doesn’t fire for dynamic search results (only when a user explicitly submits the search). GA4 batches events when GTM Preview Mode isn’t active, so there’s a delay of several seconds between action completion and event transmission. The Shopify clicked Customer Event captures element clicks but not link clicks in the same way. You can refer to the Google Tag Manager official documentation for detailed guidance on debugging triggers and variables.
The Event Settings variable should contain page_location, page_referrer, and page_title parameters. Double-check that your GTM variables properly fire and capture in GA4. For page referrer, it displays the penultimate storefront page when navigating from checkout back to storefront – this looks odd but is expected behaviour. When everything checks out, stores consistently see Cost Per Acquisition (CPA) come down as cleaner data feeds back into ad platform bidding algorithms.
At First Rank, we recommend running a full testing cycle any time you update your GTM container. It takes twenty minutes and saves you from weeks of bad data.
Get Expert Help Installing Google Tag Manager On Your Shopify Store
Getting GTM right on Shopify isn’t just about pasting code. It’s about building a tracking foundation that gives you trustworthy data for every marketing decision you make.
GA4 supports ecommerce tracking by sending event-based data, and when configured properly, you can track the full customer journey from first click to purchase. Linking GA4 with Google Ads improves remarketing campaigns by feeding accurate conversion data back to Google’s algorithms. The solution tracks ecommerce events using a simple product ID across all events, and every event contains an easy-to-read content group parameter for breaking down reports by page type. Salla allows direct integration with Google Tag Manager using the same event-based approach, so merchants operating across both Shopify and Salla can standardize their tracking with a single GTM methodology.
Server-side GTM (sGTM) provides even better data accuracy by moving tag processing off the visitor’s browser and onto your own server. This first-party cookie advantage means you recover conversions that ad blockers and browser privacy features would otherwise hide. Stores running a theme.liquid-only installation typically miss 15-25% of purchase events compared to a hybrid or server-side setup. Platforms like Stape make server-side hosting accessible at $20-100 per month, and for stores spending significantly on ads, the recovered conversion data pays for itself quickly. Elevar and LittleData both include server-side tracking options that recognize returning anonymous users and stitch sessions together.
Google Consent Mode v2 is now required for European Union (EU) traffic and increasingly expected by Google Ads worldwide. Configuring consent signals from a CMP like Pandectes or Consentmo to work with GTM inside Shopify’s custom pixel sandbox takes careful setup, but it’s non-negotiable for European customers.
Enhanced Measurement in GA4 enables automatic event tracking for scrolls and outbound clicks, but needs configuration alongside your GTM setup rather than competing with it.
We’ve helped ecommerce brands move from broken tracking to clean, reliable data that drives growth. Whether you need a straightforward GTM installation, a full server-side setup, or help untangling duplicate data, we’re here to make it painless.
If you’d like your tracking done right the first time, reach out to our team at First Rank. We’ll get your Shopify store’s data working as hard as you do.
Frequently Asked Questions About GTM And Shopify
Does Google Tag Manager Slow Down My Shopify Store?
GTM minimizes the risk of slowing down your Shopify store through asynchronous script management. Tags load in the background without blocking page content from rendering. The impact on page speed is negligible when your container is well-maintained. Where stores get into trouble is loading dozens of heavy tags that each make external requests. Keep your container lean and your site stays fast. GTM installation doesn’t affect your site traffic or Search Engine Optimization (SEO) crawling.
Can I Use GTM And Shopify’s Native Tracking At The Same Time?
You can, but you need to be careful. Shopify’s native Google & YouTube sales channel sends data to Google Analytics, and if you’re also firing GA4 tags through GTM, you’ll get duplicate purchase data. Other tracking tools can cause duplicate event data in Google Analytics the same way. The fix: if you’re using GTM for GA4 tracking, disable conversion tracking in Shopify’s native channel. Pick one source and stick with it.
Why Is GTM Not Firing On My Shopify Checkout Pages?
The GTM script in your theme.liquid doesn’t track checkout page events. Checkout tracking requires either a custom pixel setup or a third-party app. Old GTM tracking methods will no longer be supported for Shopify checkout pages, and checkout.liquid is fully deprecated. Granular checkout tracking was previously limited to Shopify Plus merchants, but Customer Events with custom pixels now work on all Shopify plans.
Do I Need GTM If I Only Use Google Analytics On Shopify?
You don’t strictly need it, but you’ll want it. GTM gives you version control, easier debugging, and the ability to add new tracking without editing code. It also lets you set up event tracking for specific actions like button clicks, form submissions, and video plays without developer help. Once you start running paid ads, GTM becomes essential for accurate conversion tracking and remarketing.
How Do I Track Menu Clicks And Navigation In GTM On Shopify?
The navigation menu is only present on the storefront, so menu click tracking is handled through your theme.liquid GTM container rather than the custom pixel. Menu click tracking narrowing can be done using CSS classes to target specific navigation elements. The common menu class across Shopify themes is `list-menu__item`, which you can use in a GTM Click trigger’s CSS selector to capture only navigation clicks rather than all link clicks on the page.
What Happens When A User Changes Cookie Consent Preferences?
GTM reads the previous cookie value instead of the updated one when a user changes their consent preference mid-session. If a visitor initially accepts cookies and then revokes consent, GTM tags may continue using the original consent state until the page fully reloads. The workaround is to force a page refresh after consent changes, which most modern CMPs like Pandectes and Consentmo handle automatically through their Shopify integrations. Test this flow specifically during your Quality Assurance (QA) process.
What Shopify Plan Do I Need To Use Google Tag Manager?
GTM works on Shopify Basic and Plus plans equally. The custom pixel method is available to both Shopify Plus and non-Plus merchants. You don’t need an upgraded plan for basic GTM functionality. Shopify Plus gives you access to additional checkout customization options, but the core GTM installation methods covered in this guide work across all current Shopify plans.
How Do I Track Shopify Purchases And Revenue Through GTM?
You’ll need a purchase event that fires on your thank-you page with the correct ecommerce data. User data like name, email, and address is included in the purchase `dataLayer.push()` call, along with product details, revenue, and discount information. The coupon parameter stores coupon codes as a string, and the affiliation parameter automatically fetches your store name. Set up a GA4 Event tag that fires on the purchase event, and verify it using GA4 DebugView. Stripe test mode lets you run test transactions to confirm everything captures correctly before going live.
Jacob Kettner is the owner and CEO of First Rank Inc., a digital marketing agency based in Winnipeg, Manitoba. He currently sits on Manitoba Chamber of Commerce Small Business Advisor Council which assists people grow their small businesses in Manitoba.